

How To Resize Photos In Windows
Summary :
Do you process a large number of images on Windows 11 PC every solar day? And practise yous want to resize multiple images at once in Windows 11? Well, this article from MiniTool Partition Wizard tells you how to do that.
Quick Navigation :
- How to Resize Multiple Images at In one case in Windows 11?
- Lesser Line
- User Comments
Windows 11 just allows you lot to adjust the size of a photo at a time through the photo application or drawing. Yet, Microsoft also provides a gratuitous small utility chosen PowerToys that allows you to resize multiple images at once in Windows xi. The post-obit shows you how to resize multiple images at one time in Windows 11 using this utility.
How to Resize Multiple Images at One time in Windows 11?
If yous need to resize a large number of images, instead of resizing them one by one, you can use PowerToys to resize images or photos in batches. Here are some steps to aid you resize multiple images.
Install PowerToys
Pace 1: Download the PowerToys app from the Microsoft Site. And then run the installer to install the software.
Footstep two: Open up the PowerToys app and click the Image Resizer selection on the left side. Then make sure that the Enable Prototype Resizer option is turned on.
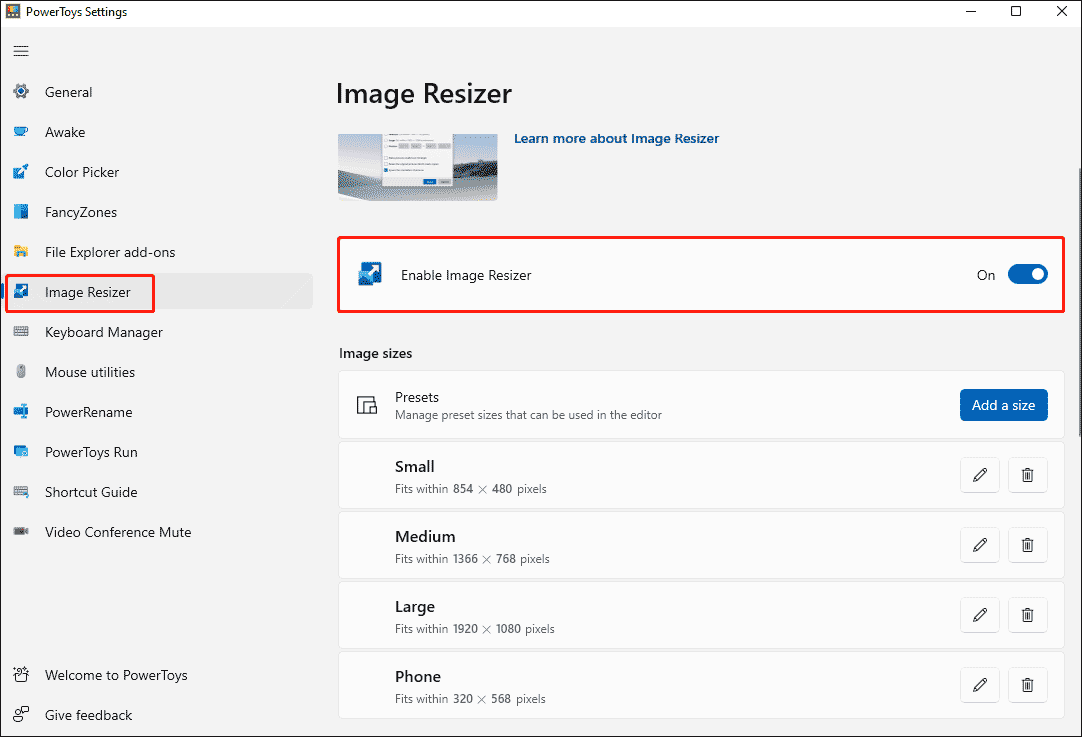
Tip: From this window, you tin configure other options, such as adding preset sizes that can be used when resizing images, selecting a backup encoder, setting file name formats, etc.
Subsequently enabling the Image Resizer function in PowerToys, when you right-click one or more images in Windows, a Resize Film option will appear in the context bill of fare.
Resize Multiple Images at Once
Permit's see how to resize multiple images at one time in Windows 11 using PowerToys.
Stride 1: Open File Explorer and get to your prototype location.
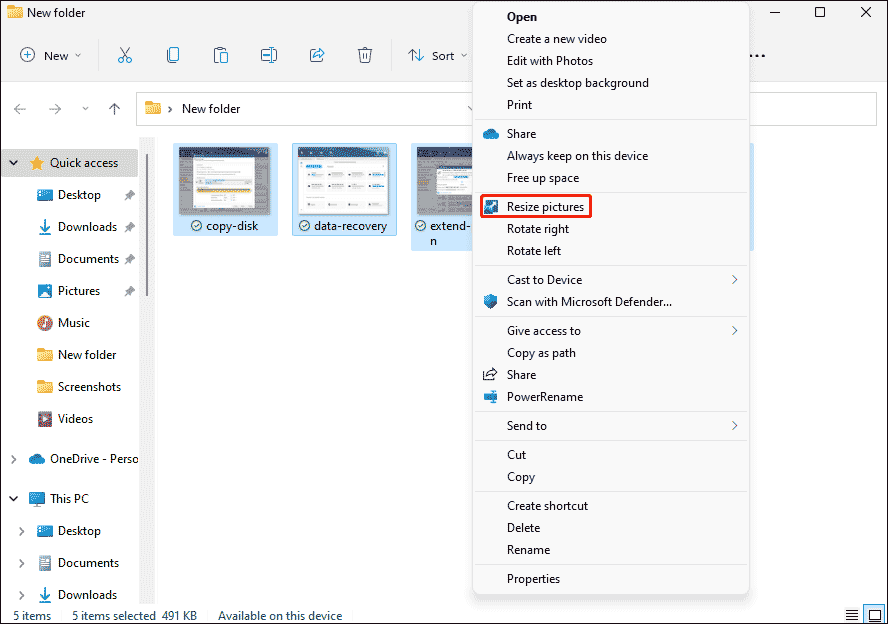
Pace ii: Select the epitome/images you desire to resize. Right click the epitome(s) and click Show More than Options.
Step 3: Click the Resize pictures choice.
Step 4: Choose the size according to your needs. The available stock-still sizes are Minor, Medium, Large, and Phone. You lot can choose Custom to manually enter a specific width and height to adjust the image size.
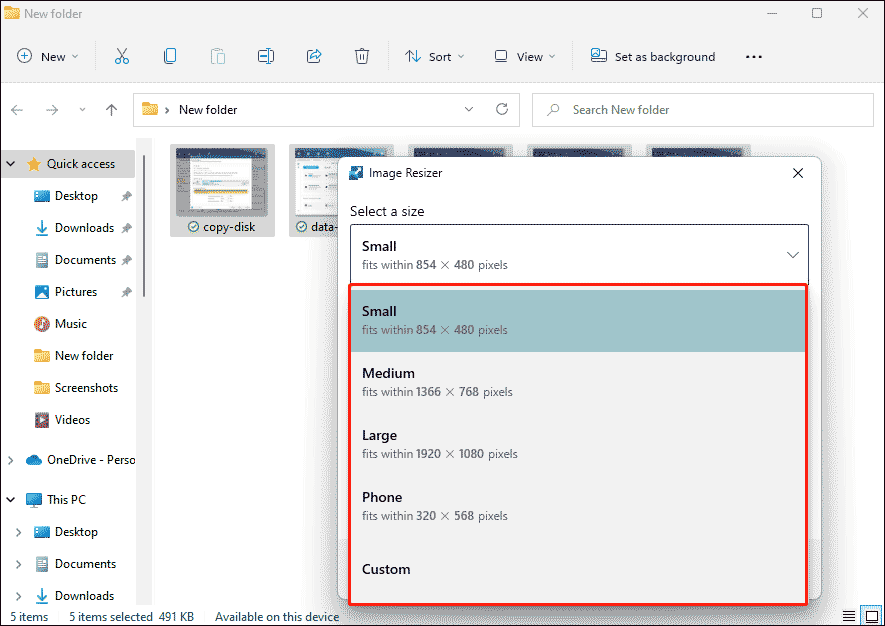
If you lot choose custom size, you need to select the resize type:
- Fill up will increase or decrease the width of the photo to go far fit the screen.
- Fit volition increase or subtract the height of the photograph and then that it fills the screen.
- Stretch volition force the picture to fit the unabridged screen, then it may cause moving-picture show baloney.
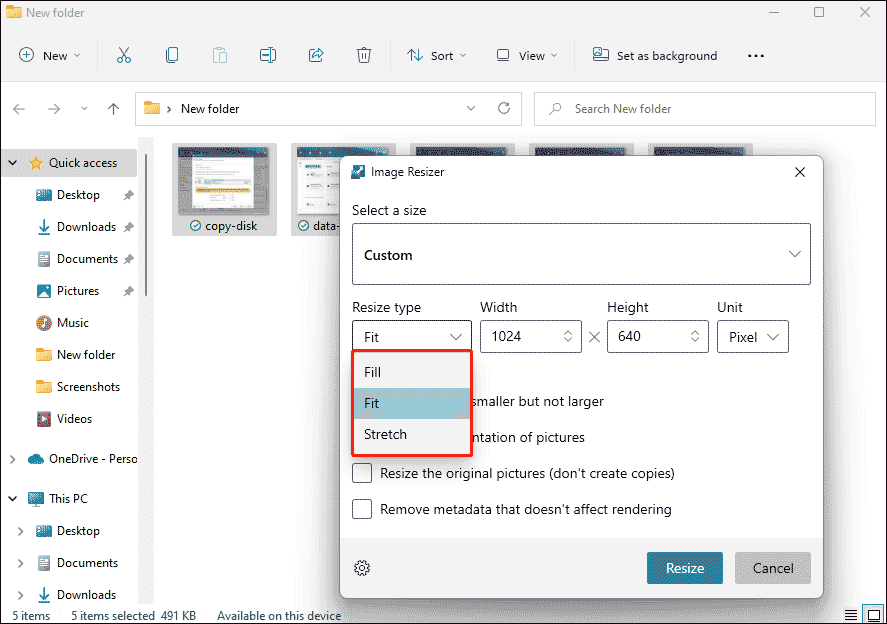
Step 5: Click on the Resize option. When finished, a copy of the original image will be created in the same binder.
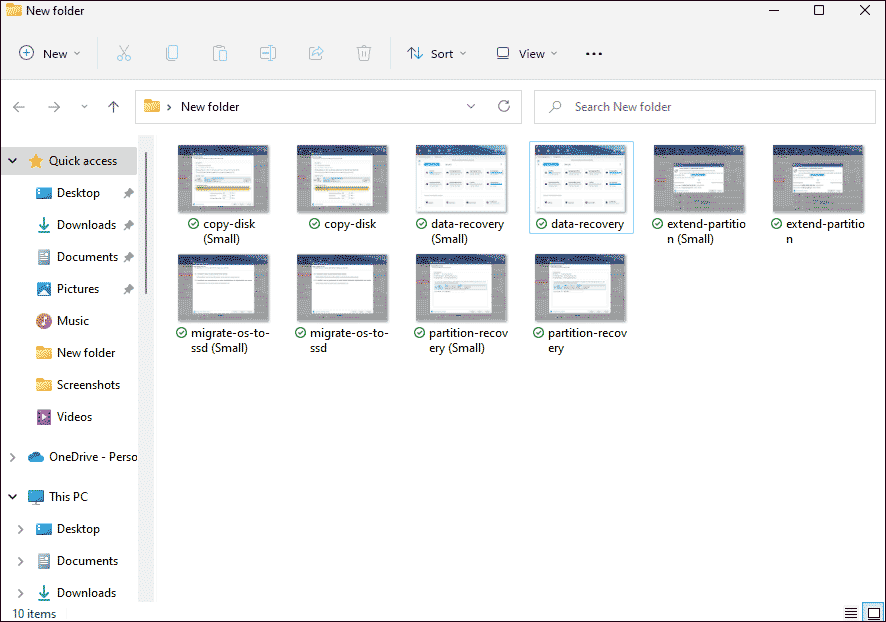
In this mode, y'all can see that each image you have previously selected is at present resized.
Add a Preset Size for Paradigm Resizer
To add a preset size so that you don't accept to manually enter a custom size every time you resize the image. The steps are every bit follows.
Step ane: Open the PowerToys Settings and navigate to the Epitome sizes zone.
Pace 2: Nether the Prototype sizes, click Add a size next to Presets.
Pace three: Click the edit push next to the new size. Select the suitable type and enter the custom width and height.
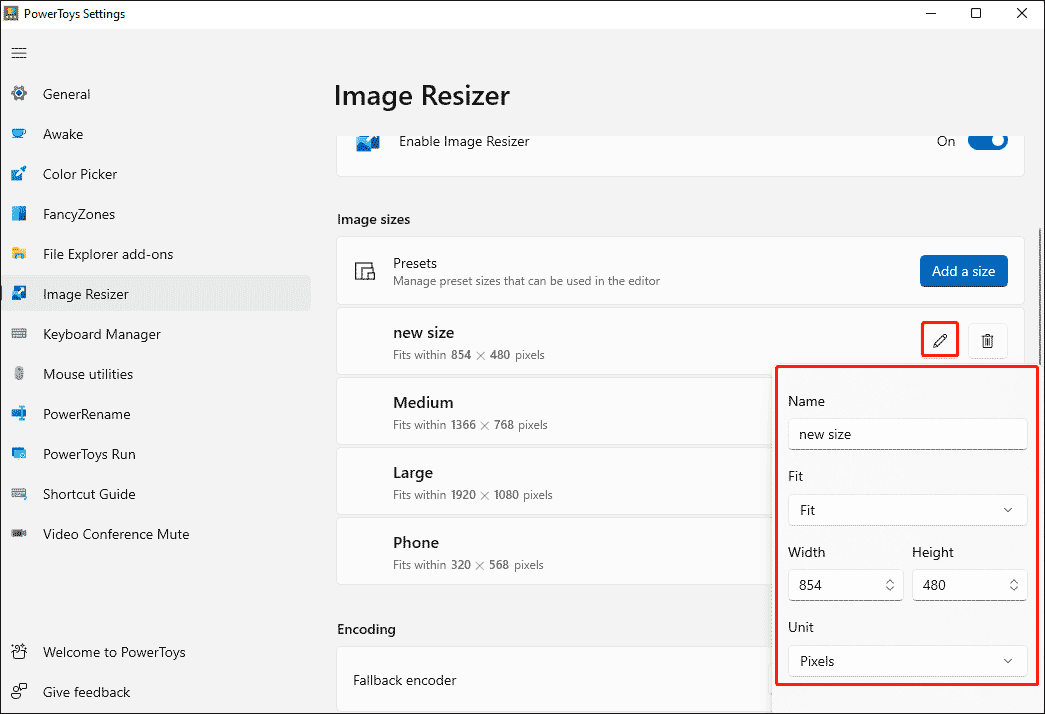
After that, when y'all cull to resize the picture show, the added size will be available as an pick in the image adjuster window.

How to create a system paradigm Windows 11? A lot of users are searching for the question. This post will provide a full guide to create a Windows 11 organization image.
Lesser Line
As yous can see, a complete guide on how to resize multiple images at in one case in Windows 11 is illustrated in the mail. If yous know other methods, please share them with u.s..
Source: https://www.partitionwizard.com/partitionmanager/resize-multiple-images-at-once-in-win-11.html
Posted by: mclawhornapigh1968.blogspot.com
0 Response to "How To Resize Photos In Windows"
Post a Comment